Well, after going through all the wonderful recipes submitted for our fun contest we realized that with so little time, everyone who submitted a recipe won! So our congratulations to each of you! We will be in touch to arrange delivery of your prizes.
Our prize winners are:
Sarah's Cherry Sweet Potatoes
Ingredients:
8-10 sweet potatoes
2 Tbsp cherry juice concentrate
1 Tbsp brown sugar
1 Tbsp melted butter
1/8 tsp ground ginger
Green onions, sliced, to taste
Directions:
Cut cleaned sweet potatoes in half (but don't peel them). Spray a cookie sheet with Pam, place the sweet potatoes with the cut-side down on the sheet. Bake 30-40 mins. at 400 degrees. Stir cherry juice concentrate, brown sugar, melted butter, and ginger together. Flip the sweet potatoes over, and brush with the cherry mixture. Bake at 400 degrees until tender (an additional 5-10 minutes). Sprinkle with green onions and serve.
Kitchen Dweller's Refrigerator Rolls
YUMMYYY! This is a recipe that lots of people use on Big Daddy's side of the family. They are so light and fluffy, and practically melt in your mouth. The batch makes 32 and they usually don't last two days. We may like them a little too much, if that is possible.
Ingredients:
2 pkgs dry yeast (1 1/2 Tbsp)
1/2 c warm water
1 Tbsp sugar
2 eggs
1/2 c sugar
1 tsp salt
3/4 c warm water
1/2 c melted butter
4 3/4 c flour
melted or softened butter (additional)
Directions:
Dissolve yeast in 1/2 c warm water with one Tbsp sugar and set aside for at least 10 minutes.
In a large bowl, beat the eggs. Add the sugar and mix. Mix in the salt and warm water, then add the melted butter and dissolved yeast mixture. (Make sure the better is not super hot, we do not want to make scrambled eggs!:) ). Stir in the flour (the dough should be a tiny bit sticky, I also just usually mix in the flour with my hands). Cover the dough and refrigerate for two hours or over night. Grease two large cookie sheets. Split dough into two balls and roll out into big circles. Spread on the melted or softened butter (this is where I like to melt it and use my pastry brush). Using a pizza slicer cut each circle into 16 pieces. Roll up into crescent shapes and place onto greased cookie sheet. Cover rolls with a towel and let rise for about 1 1/2 hours. Preheat oven to 350 degrees F. Cook one sheet at a time for about 10 minutes or until golden brown. If you are feeling crazy right when you take the rolls out of the oven spread some butter on the top!
Kaelee's Sweet Potato Casserole
This is my favorite Sweet Potato Casserole recipe we have every Thanksgiving!
Ingredients
2 cans sweet potatoes-mashed
1/4 tsp salt
2 eggs beaten
1/2 tsp cinnamon
1/4 c butter
1 tsp vanilla
1/2 c sugar
canned milk
(topping)
1/4 c butter
3/4 c brown sugar
3 Tbsp flour
Directions
Blend all ingredients together. Add canned milk until smooth. Pour into casserole dish, and crumble topping on the top. Bake at 350 degrees for 30 minutes.
Stacie's Cranberry Sauce Extraordinaire
Ingredients
1 c water
1 c white sugar
1 (12 oz.) package fresh cranberries
1 orange, peeled and pureed
1 apple, peeled, cored, and diced
1 pear, peeled, cored, and diced
1 c chopped dried mixed fruit (can be anything you want it to be)
1 c chopped pecans (optional)
1 tsp ground cinnamon
1/2 tsp ground nutmeg
1/2 tsp salt
Directions
In a medium saucepan, boil water and sugar until the sugar dissolves. Reduce the heat to simmer and stir in cranberries, pureed orange, apple, pear, dried fruit, pecans, salt, cinnamon and nutmeg. Cover and simmer for 30 minutes, stirring occasionally, until the cranberries burst. Remove from heat and let cool to room temperature.
Thanks so much for joining with us for this contest, and especially all you who shared your favorite recipes with us! We'll be posting the next recipe contest shortly, so stay tuned! Congratulations again to each of you!
Wednesday, November 24, 2010
Pie Crust
An essential part of a good Thanksgiving dinner is a delicious pie. The basis for said pie is a well made, tasty, flaky crust. As a kid, my mom never bought our pies; we always had homemade pie. Because of this, I grew up never eating frozen pie or store-bought pie (and I still won't eat that stuff). Mom didn't like pumpkin pie, so it was usually warm homemade apple pie. I'll be posting that traditional recipe in a bit, but first we need to go over some pie crust basics. Pie crust is an easy recipe to master and so worth not going and buying a frozen crust, I promise. I'll walk you through the steps and show you pictures along the way--don't be afraid, you can do this!!
Pie Crust
2 1/2 c all purpose flour
1 1/4 tsp salt
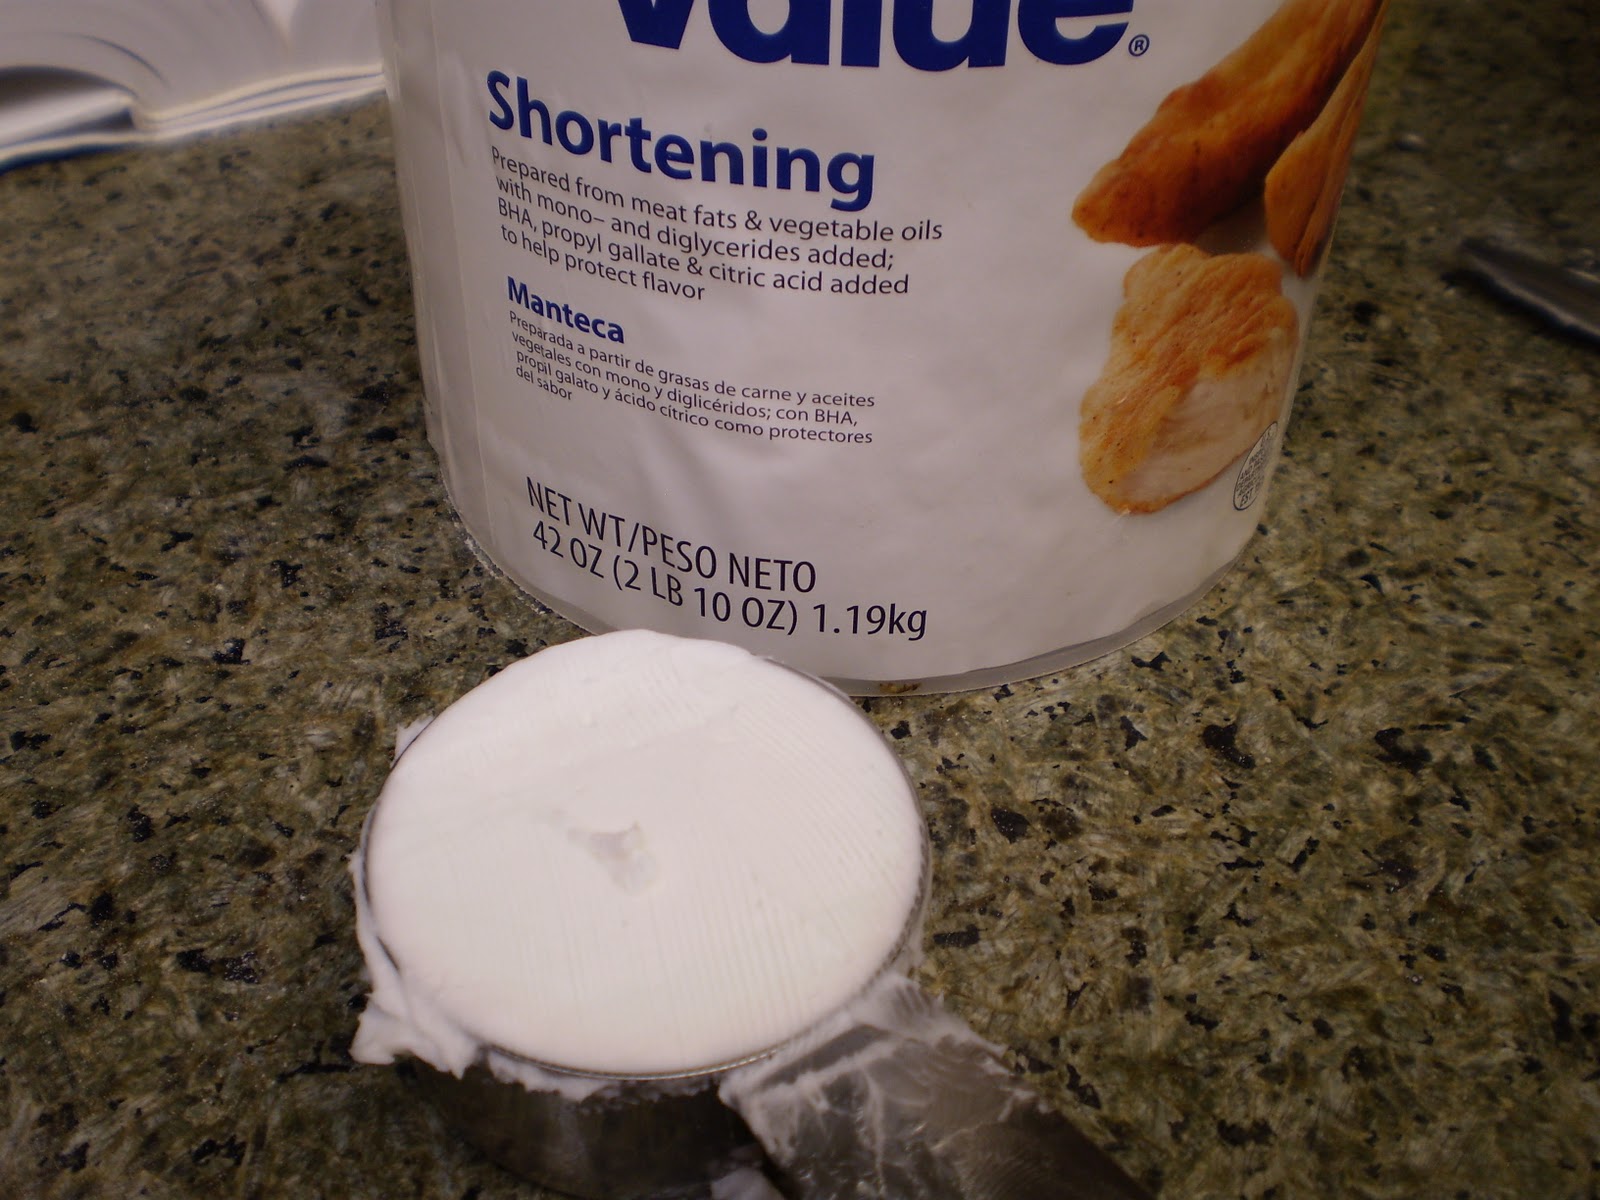
3/4 c COLD shortening
3 tbsp COLD butter
6-8 tbps COLD water
Simple recipe, and it's all about technique. And YES IT DOES MATTER THAT THE FATS AND WATER ARE COLD!!! REMEMBER THIS--IT'S VERY IMPORTANT!!

Step 1: Sift your flour and salt into a large mixing bowl. This one recipe where sifting does make a difference. You want to incorporate air into it so it stays light and fluffy.

Step 2: Measure out your shortening. You may need to press it into the measuring cup with a knife or spatula. Add this to your flour mixture.

Step 3: Add your butter to the shortening and flour. Cut it into pieces so it breaks up when you cut it in with your pastry blender.

Your bowl should look like this:

Step 4: You'll now use a pastry blender which looks like this:

to combine the flour with the butter and shortening together until it looks like this:

Step 5: Adding your water.

You'll want to add half of the water (about 4 tbsp) at first. Then you'll lightly mix it with a fork, and add the rest of the water 1 tbsp at a time and stirring in between each addition until it looks like this:

Step 6: The dough is done. Don't continue to mix. Don't over handle it. At this point, you need to pull out your handy box of plastic wrap. Pull out a piece of the plastic wrap and place it on your counter or table.

Step 7: Divide the dough in half, and form each half gently with your hands into a disc. Place this on top of the plastic wrap and wrap tightly.


And you are done! Put the tightly wrapped bundles in the fridge, and in a couple of hours you will be ready to roll it out!! I'll show you how to do that in the assembly recipes.

Pie Crust
2 1/2 c all purpose flour
1 1/4 tsp salt
3/4 c COLD shortening
3 tbsp COLD butter
6-8 tbps COLD water
Simple recipe, and it's all about technique. And YES IT DOES MATTER THAT THE FATS AND WATER ARE COLD!!! REMEMBER THIS--IT'S VERY IMPORTANT!!

Step 1: Sift your flour and salt into a large mixing bowl. This one recipe where sifting does make a difference. You want to incorporate air into it so it stays light and fluffy.

Step 2: Measure out your shortening. You may need to press it into the measuring cup with a knife or spatula. Add this to your flour mixture.
Step 3: Add your butter to the shortening and flour. Cut it into pieces so it breaks up when you cut it in with your pastry blender.

Your bowl should look like this:

Step 4: You'll now use a pastry blender which looks like this:

to combine the flour with the butter and shortening together until it looks like this:

Step 5: Adding your water.

You'll want to add half of the water (about 4 tbsp) at first. Then you'll lightly mix it with a fork, and add the rest of the water 1 tbsp at a time and stirring in between each addition until it looks like this:

Step 6: The dough is done. Don't continue to mix. Don't over handle it. At this point, you need to pull out your handy box of plastic wrap. Pull out a piece of the plastic wrap and place it on your counter or table.

Step 7: Divide the dough in half, and form each half gently with your hands into a disc. Place this on top of the plastic wrap and wrap tightly.


And you are done! Put the tightly wrapped bundles in the fridge, and in a couple of hours you will be ready to roll it out!! I'll show you how to do that in the assembly recipes.

Monday, November 22, 2010
Garlic and Chives Mashed Potatoes

Garlic and Chives Mashed Potatoes
4-5 large baking potatoes, washed with any 'spoil spots' trimmed off
2 cloves garlic, peeled
2+ tsp kosher salt
3 Tbsp butter
1/4 c cream (or evaporated milk)
2-3 Tbsp sour cream (to taste)
2 Tbsp freshly chopped chives (or to taste)
Cut potatoes into 1/2 in cubes (do not peel!), then put into a 3 qt. pot. Fill with water until potatoes are covered, then pour in salt and whole garlic cloves. Boil until potatoes are soft, then drain. Put hot potatoes into a mixing bowl and beat on low, all the while adding butter, cream, sour cream, and finally 1/2 the chives until it reaches your favorite consistency. Place into serving bowl and sprinkle the remaining chives over the top. Add a small pat of butter (for decoration to really help those salivary glands kick in!).
I know that traditionally everyone peels the potatoes before boiling them. I'll give you a little tip from a childhood spent playing in potato fields in Idaho: you don't have to do it! Most of the nutritional value found in potatoes are in their peels, including several nutrients that help with weight loss. When you add that to the wonderful textures that your tongue loves to play with while you are eating your mashed potatoes, you can see why we recommend leaving them in the dishes!
Green Bean Casserole

Generally the cliche dish of the holidays, this casserole gets a lot of flack. But I have found that if you do it right and don't use canned ingredients, the flavor is much better. The texture is also better because the green beans haven't been cooked to mush. I searched the Food Network archives for a good one, because I actually love this as a Thanksgiving side dish and I wanted to make a tastier version of it. My friend Alton Brown has saved me and you with this great recipe! And don't worry, it's in the public archive, so there's no copyright issue.
I will admit I didn't make my own french fried onions. I just bought the canned ones. Saved me time and effort, and I like the canned ones just fine.
Green Bean Casserole
1 lb fresh green beans, ends snapped off and beans snapped in half
1 gallon of water
salt
2 tbsp butter
12 oz sliced button mushrooms
1 tsp salt
1/2 tsp pepper
2 cloves garlic minced
1/4 tsp ground nutmeg
2 tbsp flour
1 c heavy whipping cream
1 c chicken broth or stock
1 large can of french fried onions, divided in half.
Fill a large stockpot with the water, and bring to a boil. Blanch beans in water for 5 minutes and immediately rinse with cold water or plunge into ice water to stop cooking. Set aside.
While the water is heating and beans are cooking, saute mushrooms in the butter. When the mushrooms start to release their liquid, add garlic, salt, and pepper. Sprinkle the flour into the pan over the mushrooms and stir to coat everything, til flour is absorbed. Add chicken broth or stock and then cream, and stir til combined, and til smooth and thick. Stir in half the onions to the sauce and add beans. Pour into a greased square baking dish, and then top with the rest of the onions. Bake at 400 degrees for 20 minutes til top is browned and casserole is hot and bubbly.
Sweet Potatoes Anna

I love sweet potatoes in any form, but don't ever ask me to eat even a bite of those vile things they call candied yams. Too much sugar, and too mushy and just not good eats (as Alton Brown would say...). I'll eat sweet potatoes mashed, baked (just like a normal potato), and just about any other way but candied. This recipe is one of my favorites, and my grandma found it somewhere a long time ago. Very simple recipe and very tasty results. I hope you like them as much as I do.
2 lbs sweet potatoes (about 3 large sweet potatoes)
1 stick of butter, melted
parmesan cheese
Set oven to 435 degrees. Slice the sweet potatoes super thin, like you would Au Gratin potatoes. I used a salad shooter type thing and just ran them through on the slicer blade, but you can also use a food processor slicing blade, or a mandolin. They should be about 1/8 of an inch thick. In a spring form pan, spray a tiny bit of cooking spray just so stuff doesn't stick. Place a layer of your potatoes on the bottom of the pan so all of it is covered--you'll want to have a good 1/2 inch layer. Using a turkey baster, drizzle the potato slices with the melted butter, and then sprinkle the layer with the parmesan. Add another good layer of potato slices, and then more butter and more cheese. Top with another layer of potato slices, and then another layer of butter and cheese. Top with the rest of the potatoes, and then top the whole thing with the remaining butter and cheese. Cover with foil, and press down to compress everything. Bake covered for half an hour, and then remove the foil and bake another half an hour. Top will be browned and golden. Drain of any excess butter, and let stand for 5 minutes. Remove the clamped side of the pan, and then cut the potatoes into wedges and serve with your favorite veggie and protein.
Saturday, November 20, 2010
John's Traditional Roasted Turkey

Johns' Traditional Roasted Turkey
Ingredients:
18-22 lb. frozen turkey (about 15-20 lb. fresh turkey)
2 Tbsp + 1 Tbsp olive oil
2 Tbsp + 1 Tbsp butter (not margarine)
2 Tbsp balsamic vinegar
1/2 tsp sage
1/2 tsp rosemary
1/2 tsp fennel seed
1 tsp kosher salt
1/4-1/2 tsp black pepper (to taste)
1/4 c warm water
2 cubes chicken boullion
Preheat oven to 450 degrees. Prepare a fully thawed, cold turkey for cooking (remove giblets and such), and place in roaster. Grind kosher salt, black pepper, fennel seed, rosemary, and sage together in a mortar and pestle or spice grinder. Mix the 2 Tbsp oil, 2 Tbsp butter, and balsamic vinegar together and baste the turkey. Spread the spices over the top. Put the boullion cubes in the cavity of the turkey, then add the water to the turkey as well. Cover with a lid or tented aluminum foil (do not allow the metal to touch the bird). Bake in the oven at 450 degrees for 15-20 minutes, then reduce heat to 350 degrees and roast for about 3 to 5+ hours depending on the size of bird (read the distributor's instructions). When the turkey reaches 130 degrees, remove the lid or foil tent, drizzle the remaining butter and olive oil over the top, and continue baking uncovered until the bird reaches 165 degrees (make sure you are reaching the deepest part of the bird: the meat right next to the breast bone in the back. If you need to, test more than one place!), then remove from the oven. Let rest for 20 minutes before carving. Enjoy!
Please note: I know that there are a lot of hard-core stuffed turkey fans out there. But to help guarantee the food safety of your turkey, our recommendation is to bake your stuffing separately using the turkey drippings while the turkey meat is resting unless you have a great deal more experience. No one wants an attack of food poisoning during their Black Friday shopping! Besides, the contents of most traditional stuffings are such that they will often dry out your turkey meat by drawing away flavor and moisture. So prepare it instead as described in our Stuffing post, and then simply serve it with the turkey to the delight, and possible confusion, of your friends and family.
Another piece of information for all of you that you have probably already heard or seen: America is not the only country to offer a national holiday just about offering thanks. And we are not even the only ones who do it through putting ourselves into a food coma!
For centuries, even millennia, man has been celebrating his good fortune by feasting himself into a stupor. The Celts did it with their Samhain celebrations (yes, this was a feasting time to celebrate a plentiful hunt and harvest preparatory to a long winter), the Chinese with their harvest Moon Festival, The Seneca Indians with the "Green Corn Dance", the Iroquois their "Great Feather Dance", the Hebrew "Feast of the Tabernacles", the Greek's 9 day harvest feast honoring Demeter, The Romans' "Cerealia", the...do you really want me to go on? If you want proof, please simply google "harvest festivals" and read up yourself (it makes for fun reading, but you aren't checking out this blog to read an anthropology textbook).
So, Americans aren't the first to have harvest festivals or thanksgiving feasts. We weren't even the first to have turkey's happily consumed. But with the colonization of the "New World" bringing in British Christians who quickly...shall we say 'culturally overwhelmed' the native inhabitants, the new locals began to celebrate the own anniversaries through adopting some native common sense. These 'early thanksgiving feasts' did not really resemble our modern traditional assumptions, but there were a few things that everyone would recognize and chief among these was, of course, good ol' Tom Turkey! So when you are drooling over that amazing bird this Thursday, remember that you are also joining in with a large population of ancestors and previous citizens who were more than happy to celebrate the same as you!
One other fun trivia note for you die-hard fans out there: (and this one I'm quoting directly from www.brownielocks.com/thanksgiving.htm) "The custom of snapping the turkey's wishbone, to bring good luck or make a wish come true to the person who gets the largest part goes back to the Romans. When the Romans conquered England, they introduced it. And by the time the Pilgrims brought it to the New World, it was an established custom in England for years. Many word origin philosophers feel that the bone-snapping of the wish bone is the source for the common expression, "To get a lucky break." The person who gets the shorter end when it breaks will not get his/her wish. Gotta love carrying on traditions!
Pumpkin Pie
This is a classic Thanksgiving dessert, and while not my personal favorite, my husband and his family very much enjoy it. I was asked to make a lot of these this year, and so I got a jump on it today while I was working on the Apple Cranberry Pie as well. It's a pretty straight forward, classic recipe, so I think you'll find it's about the same everywhere. The only difference is, instead of using cloves in the filling, I used allspice because to me, cloves are a bit too strong.
Pumpkin Pie
1 1/2 c sugar
1 tsp salt
2 tsp ground cinnamon
1 tsp ginger
1/2 tsp allspice
4 eggs
1- 29 oz can of pumpkin puree
2- 12 oz cans of evaporated milk
1 recipe double crust pie--2 wrapped discs (makes 2 pies)

Mix sugar, salt, and spices together in a large mixing bowl. Add eggs and pumpkin and blend well with hand mixer or stand mixer.

Add evaporated milk and mix well to combine everything. It should look like this when you are done:

It will be very soupy and liquidy. Don't worry, it will set up in the oven and after it cools. Set this aside so you can get your crust rolled out.
Just like with the apple pie, we will go over this again. Dust your pastry board with some flour. Place your dough in the center and dust with flour again. Place plastic wrap over the top, and roll it out.

Make sure when you roll it you roll up and down, as well as diagonally so you get a round shape instead of a long oval shape. When you are done rolling it (it should be pretty thin), peel the dough and plastic wrap off the pastry board (the dough will stick to the plastic wrap, it makes it easier to transport to your pan) and place in the bottom of your pan. You will do this twice for two pies because the recipe makes 2 pies.

Trim your edges this time because you won't be using a top crust. You can crimp the edges if you like, or you can just let them lay flat, but you don't want the ragged edge or any overhang. Pour half of the filling into each pie pan. Bake at 400 degrees for 15 minutes, and then drop the temperature to 350 and bake for another 45 to 50 minutes.

Let cool and then chill in the refrigerator til ready to serve. Serve with whipped cream on top.
Apple Cranberry Pie
My mom makes this every year for Thanksgiving and I love it. She used to just make a plain apple pie, but one year she decided to add some fresh cranberries to the mix and see how it worked and we all loved it. You do need a bit more sugar, but it's a hit! A little sweet, a little tart, and very delicious. Here's how to make it.
Apple Cranberry Pie
1 recipe double crust pie--two wrapped and refrigerated discs of dough (tutorial and recipe posted previously)
3 granny smith apples
3 jonagold apples
6 oz (half a bag) of fresh cranberries
1 tsp ground cinnamon
1/2 tsp each allspice and nutmeg
4 tbsp flour
1 tbsp lemon juice
1/2 c brown sugar

I used a mixture of Granny Smith and Jonagold apples because I thought the sweetness of the Jonagolds would help balance the tartness of the cranberry. I personally like a tart apple pie, so the granny smiths are what I use on a regular basis for plain apple pie.
First, you'll want to peel your apples.
 I used a vegetable peeler, but if you do that, it needs to be fairly sharp. You can also use a paring knife. After you have peeled them, quarter them and core each piece, and then slice into a big mixing bowl. Toss with the lemon juice while cutting them so they don't go brown.
Next, you'll need to mix your ingredients together. Add your cranberries to the apples, and then the spices, and the flour. Make sure your brown sugar is not clumped together, and then mix all of this together until apples are well coated with spices and sugar and flour. The flour will help thicken the juices so when you bake it your pie doesn't become runny.
Your filling mixture should look like this:

Now you are ready to roll out your dough, which you should have made and refrigerated for a least 2 hours. You'll need a pastry board, flour, and a heavy rolling pin (it helps if your rolling pin is cold, so if you have a marble one, great, if not, just put your rolling pin in the fridge when you refrigerate your dough).
Place the pastry board on the counter and generously dust with flour. Place your dough in the middle of the board, and then dust again with flour.

Cover dough with plastic wrap you wrapped it in before placing in the fridge. The plastic wrap helps so your dough doesn't stick to your rolling pin, and it helps when you need to move the sheet of dough to your pie pan. You'll want to roll up and down, and diagonally to the sides so you get a nice rounded sheet of pie dough. Place this into your pie pan, and it should look like this:

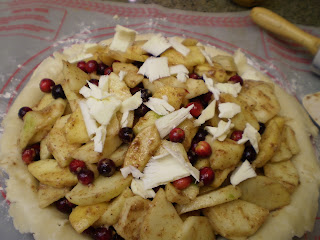
Fill your pie with the filling you made with the apples and cranberries. It will look too full, but don't worry because when you bake it, the apples will shrink and you want to over fill it so you will still have a full pie when it's done. It should look like this:

Dot the top of the pie with butter, to keep it moist so the top doesn't dry out while it bakes. Like this:
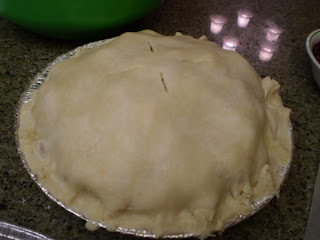
Roll out your second crust (for your top crust) and place on top of the pie. You will have some ragged edges. Trim them with a paring knife and pinch the top and bottom crusts together, and then go back around the outer edge and pinch them between your thumb and finger to make a pretty edge. Vent the top by cutting slits in the center of the top crust. It will look like this:
Bake at 400 degrees for half an hour, and then reduce the temperature to 350 degrees and bake another half an hour. Serve warm with vanilla ice cream on the side.

Apple Cranberry Pie
1 recipe double crust pie--two wrapped and refrigerated discs of dough (tutorial and recipe posted previously)
3 granny smith apples
3 jonagold apples
6 oz (half a bag) of fresh cranberries
1 tsp ground cinnamon
1/2 tsp each allspice and nutmeg
4 tbsp flour
1 tbsp lemon juice
1/2 c brown sugar

I used a mixture of Granny Smith and Jonagold apples because I thought the sweetness of the Jonagolds would help balance the tartness of the cranberry. I personally like a tart apple pie, so the granny smiths are what I use on a regular basis for plain apple pie.
First, you'll want to peel your apples.

Next, you'll need to mix your ingredients together. Add your cranberries to the apples, and then the spices, and the flour. Make sure your brown sugar is not clumped together, and then mix all of this together until apples are well coated with spices and sugar and flour. The flour will help thicken the juices so when you bake it your pie doesn't become runny.
Your filling mixture should look like this:

Now you are ready to roll out your dough, which you should have made and refrigerated for a least 2 hours. You'll need a pastry board, flour, and a heavy rolling pin (it helps if your rolling pin is cold, so if you have a marble one, great, if not, just put your rolling pin in the fridge when you refrigerate your dough).
Place the pastry board on the counter and generously dust with flour. Place your dough in the middle of the board, and then dust again with flour.

Cover dough with plastic wrap you wrapped it in before placing in the fridge. The plastic wrap helps so your dough doesn't stick to your rolling pin, and it helps when you need to move the sheet of dough to your pie pan. You'll want to roll up and down, and diagonally to the sides so you get a nice rounded sheet of pie dough. Place this into your pie pan, and it should look like this:

Fill your pie with the filling you made with the apples and cranberries. It will look too full, but don't worry because when you bake it, the apples will shrink and you want to over fill it so you will still have a full pie when it's done. It should look like this:

Dot the top of the pie with butter, to keep it moist so the top doesn't dry out while it bakes. Like this:

Roll out your second crust (for your top crust) and place on top of the pie. You will have some ragged edges. Trim them with a paring knife and pinch the top and bottom crusts together, and then go back around the outer edge and pinch them between your thumb and finger to make a pretty edge. Vent the top by cutting slits in the center of the top crust. It will look like this:

Bake at 400 degrees for half an hour, and then reduce the temperature to 350 degrees and bake another half an hour. Serve warm with vanilla ice cream on the side.

Thursday, November 18, 2010
Stuffing

Stuffing is probably my favorite part of thanksgiving, besides the pie. I'll be honest, I love the stuff. But I will admit, much to my mother's disappointment, her recipe is not my favorite. So when I got married, I decided I was going to make this recipe my own and put stuff I loved into it. Here is what I came up with. I hope you love it as much as I do!
Stuffing
1 pkg herb seasoned stuffing
1 pkg cornbread stuffing
1 c finely chopped celery
1 c finely chopped onion
1 stick of butter
8 oz sliced button mushrooms
1 1/2 c cashews
1 lb lean pork sausage
3 c (1 1/2 cans) chicken broth or stock (stock is better)
salt and pepper
cooking spray
In a large mixing bowl, combine stuffing and cashews. Melt butter in a large saute pan, and then add celery and onion. Cook vegetables til tender, and then add your sliced mushrooms. Cook til the mushrooms shrink to half their volume, and they are fully cooked. Season with salt and pepper, and then pour the whole thing into your mixing bowl with the stuffing. Brown and crumble your sausage, and then add to the stuffing mixture. Stir well to coat with the butter and veggies and moisten everything. Add your broth or stock about half a cup at a time, stirring between each addition, to coat everything with the broth and make it moist (but not soggy). Spray a 9x13 pan with cooking spray and then pour the stuffing into the pan and spread evenly. Bake for 30 minutes at 350 degrees. Serve with roasted turkey (or chicken if not for Thanksgiving) or just by itself!
As if this recipe isn't a great enough reason to check out this page, let us offer you a little bit more information about the Thanksgiving stuffing tradition...and if you don't want this part then skip to the end and enjoy your stuffing adventure!
As far as I can find, the earliest documented evidence for stuffing is a Roman cookbook (Apicius' De Re Coquinaria) which contains recipes for stuffed chicken, hare, pig, and dormouse. The stuffings described therein mostly consist of ingredients like vegetables, herbs and spices, nuts, and spelt (an old cereal). In the Middle Ages, stuffing was known as "farce" from the French "farcir"; the root of the word 'forcemeat'. The term farce was originally a short, humorous play stuffed in at intermissions between long dramatic productions...to keep the crows from simply wandering away. The term 'stuffing' is first attested in 1538. After about 1880, the term stuffing was replaced by 'dressing' in Victorian English. The primary difference between stuffing and dressing is that stuffing is traditionally cooked within the meat, and dressing is cooked separately. Though in truth, over the last few years the two have become intermingled.
The real irony here is that while stuffing an animal that is then roasted is a method that some have claimed to be as old as the history of cooking, it was not something that was seen during the first years the Puritan pilgrims were struggling through in Massachusetts. If there was bread, they would have simply eaten it rather than waste it by stuffing into a bird as they simply did not have the necessary ingredients. Yet, thanks to traditions that some say come from saving a turkey dinner from a poorly roasted bird, stuffing is a 'must have' on any Thanksgiving table. And one thing is for sure: this is a stuffing that is sure to surprise you with how much a fun twist can lie on a traditional dish!
Friday, November 12, 2010
Welcome one and all!
With the holidays literally knocking on our doors, it is time to pull out our aprons and oven mits, and get ready to play in the kitchen!
So to really kick things off with a bang, we are going to get to know everyone and as many Thanksgiving traditions as we can all at once with a recipe contest. With Thanksgiving just 2 weeks away, what better chance could we have to send out an all call to everyone for your favorite Thanksgiving recipes and what makes them special to you!
The idea of the contest is this:
We will be opening for your competing pleasure 8 categories (to be explained in detail in a moment). Each submission must include a clear recipe, with an optional explanation of what makes that item a favorite for you or your family (the explanation will not factor into the judging). The deadline for submissions is November 22nd, with the winners being announced each day of the following week. Simply email your submission to handmadeheritage@gmail.com by the deadline, or leave a comment at the end of this post.
The prizes are being hosted by The Handmade Heritage. Each winner will receive a prize package including a handmade Magnetic Recipe Board and an array of handmade gourmet candies worth over $30. The prize posted is for the winners of each category, though each complete recipe will be posted. With winners will start being posted each day starting the Tuesday before Thanksgiving, that could make for a lot of recipes to choose from! The categories and pertinent details are as follows:
Turkey: nothing is as traditionally important for Thanksgiving dinner as the turkey. Due to time constraints, we are asking this year that all turkey recipes submitted be for a roasted turkey (no deep fried, barbequed, or smoked).
Potatoes: the fun starch found partnered next to turkey each season is an american staple throughout the year. But there is so much more that can be done with it than to simply boil, mash, and serve! So bring on your creativity, lets see what you can really do!
Cranberry Relish or Sauce: one of only two items that can be said to actually enhance the flavor of a perfectly roasted turkey is the relish...yet it has been relegated to a back seat so severely that most have forgotten that it is meant to be a key for "the perfect bite". So no canned cranberry sauce. Let's see what will really make that turkey sing!
Gravy: I know it seems to be the simplest, easiest thing placed next to the tukey and potatoes, but there is no better way to spread the delicious taste of the turkey all around the plate. Yet there are so many different ways to make each gravy or sauce distinctly different, so let's bring them on and explore everyone's own favorite!
Bread: Nothing makes you think of a fine cooked meal more than the aroma of freshly baked bread! But every region of the world has their own traditional flavors, so we wanted to find out just what you do to make this tradition special for your Thanksgiving table!
Stuffing: Tradition has said that stuffing was a dish made and served along with a turkey. But this time we wanted to make sure that it could take it's own place in the spotlight! And for safety's sake, please don't submit this cooked inside the turkey. I know that there are many fantastic cooks out there who do, but we want to make these available to everyone...of any ability or experience.
Side Dishes: These can include everything from a fruity waldorf, to a traditional green bean casserole to a stuffed mushroom or squash, or even simple buttered carrots. With the wealth of options, it shouldn't be difficult to find at least one traditional favorite to submit!
Pie: Sweet, soft, crunchy, fruity, or nutty, nothing signifies the end of all the feasting like a Thanksgiving pie! Make sure that each pie recipe submitted is a fresh pastry shell (rather than refrigerated or frozen), and please no commercially prepared fillings.
With so many options, and so many traditional gems that are enjoyed each year, we can't wait to see what everyone sends in! So tie that apron sash, and good luck to everyone!
Subscribe to:
Posts (Atom)